Use your Cricut cutting machine to make easy, fun "vegan" and "gluten-free" vinyl decals for dessert charcuterie boards.
With a range of dietary preferences and restrictions commonplace today, your family or friend group likely includes people who require vegan, gluten-free, nut-free or other dietary options. Show your special guests that you care about each and every one of them with these quick and simple vinyl decals that make it clear which charcuterie board options are safe for them to eat.
I used my Cricut Maker to make cute "vegan" and "GF" decals to decorate my dessert (with a heavy emphasis on chocolate) charcuterie boards. I'll show you how you can do the same with this easy tutorial.
This is a sponsored conversation written by me on behalf of Cricut. The opinions and text are all mine. This post contains affiliate links.
Materials Needed for Custom Decals For Dessert Charcuterie Boards:
Cricut Maker or other Cricut cutting machine
Cricut removable vinyl
StandardGrip machine mat
Transfer tape
Scissors
Weeder
charcuterie board(s)
Steps To Make Custom Vinyl Decals For Dessert Charcuterie Boards:
Change the leaf colour to match the colour of the word (if you are cutting them from the same colour of vinyl). In this case, I changed both the word and the image to white. Group everything together and attach them so that they will cut as a cohesive word/image. Change the wording to the desired size you would like for your charcuterie board.
I worked on my desktop computer to this point, but switched to my phone for the cutting process. Follow the directions on-screen to complete the cutting process. You will not need to mirror your cut for this project.
Select your cutting machine from the Bluetooth accessory list.
Select your material, in this case vinyl.
Place the vinyl material colour side up on a StandardGrip cutting mat and proceed with the cut.
Weed away the excess vinyl, using a weeder where needed, in particular inside the letters.
For the gluten-free dessert charcuterie board, I thought it would be cute to use a symbol that's similar to what you find on food packaging - a "GF" in a circle. From the shapes in Design Space, insert two circles, making one slightly smaller. Place the smaller circle inside the larger circle.
Select both circles and use the slice function to cut the smaller circle shape out of the larger.
Delete the cuts you don't need.
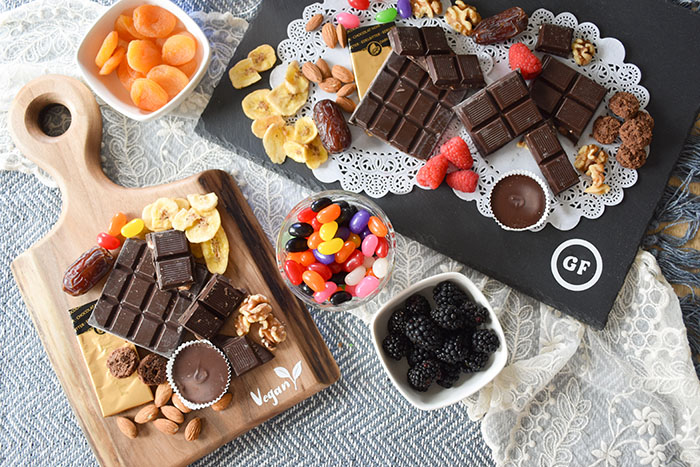
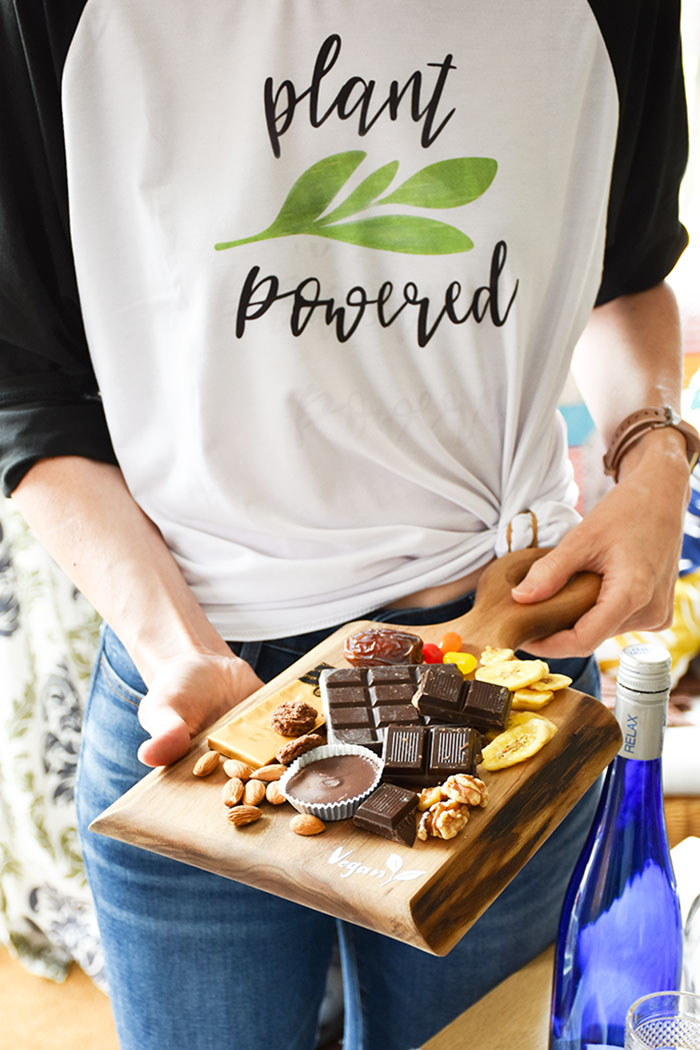
I feel like the "vegan" and "gf" images add a cute touch to the dessert charcuterie boards and make for a welcoming vibe for guests. In this case, most of the dessert items I purchased were both vegan and gluten-free so both boards are much the same, but it's nice to have the decals there. When you are busy serving food and mingling with guests, it's helpful if people don't have to ask you what they can safely eat.
I chose to pair one locally made wooden charcuterie board with a larger slate charcuterie board for a diverse look. (First I layered a couple of table runners in contrasting materials and patterns as a foundation for the charcuterie boards.) For desserts, I used various types of chocolate bars, banana chips, apricots, jelly beans, blackberries, raspberries, cashews, walnuts, almonds, gluten-free mini cookies and medjool dates. This made for a simple and quick to put together dessert charcuterie board. It's no fuss and allows you to serve drinks and chat with guests rather than being constantly on the go in the kitchen. It's so easy to put together that I would even recommend doing this just for fun one night with your kids or other family members. It would be a sweet way to celebrate the return to school this fall.
I also took the opportunity to make a fun "plant powered" t-shirt with a Cricut raglan sleeve t-shirt blank and Infusible Ink transfer sheets (as I am in the vegan category of guests/hosts myself).
As we head into fall, I'm hopeful that we'll have more (safe) opportunities to gather with small groups of family and friends and enjoy the good feelings that come from eating and drinking and chatting with loved ones. My friend suggested that chocolate pairs well with Scotch and that's a theory I look forward to testing with her.
Questions for you:
Do you have food preferences/restrictions? What words would you add to these dessert charcuterie boards? What foods would you add to your dessert charcuterie boards? Do you like chocolate (duh)?


This comment has been removed by the author.
ReplyDeletethanks
ReplyDeleteAntibacterial packaging is very important for any type of food, which protects from environmentally harmful small particles. For that reason, you can use bopa film manufacturer/ supplier's film where the films protect your food from every harmful particle.
ReplyDelete