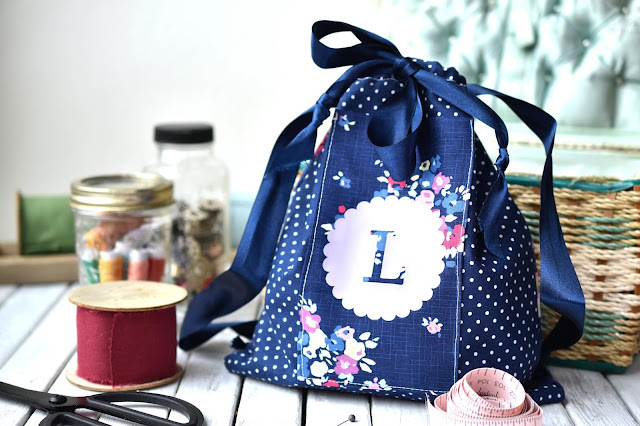
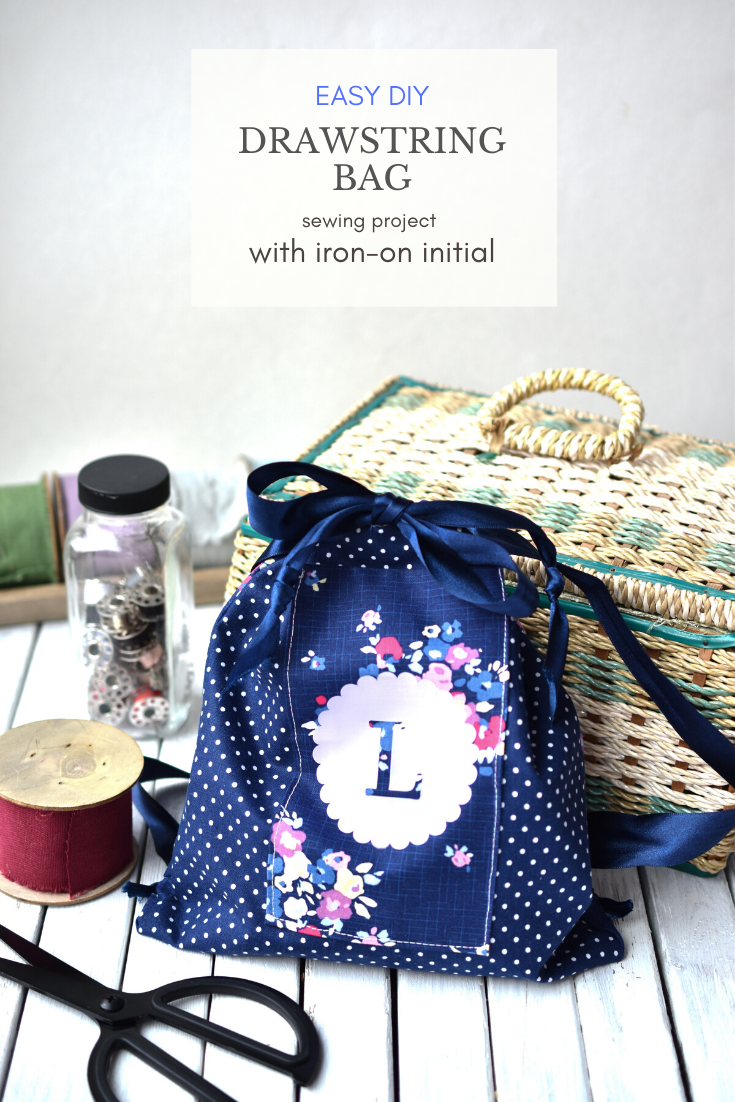
With the holidays fast approaching, I know that many of you have added a Cricut cutting machine to your wishlist. And who can blame you? Cricut machines are so much fun to use and you can craft projects from cards to jewelry to doll clothes. (If you get a Cricut Maker or Explore Air 2 before Christmas, you can even make gifts with it!) I own the Cricut Maker and it's a good choice for me, because I love the versatility of it. If you are wondering if Maker is the right machine for you, read on for the 5 things I love about my Cricut Maker. I also have a first project idea for you - a cute, easy DIY drawstring bag sewing project. This bag is personalized with the initial of the recipient using iron-on material and it makes a lovely, eco-friendly gift bag that can be re-used again and again.
5 Things I Love About My Cricut Maker
1. First and foremost, what I love about my Cricut Maker is that it inspires and encourages creativity. It's a little kick in the pants to get you going on your craft and sewing projects because they're easier to accomplish with the help of the Maker. Even if you don't consider yourself a particularly crafty person, there are so many ready-to-go projects in Cricut Design Space that creating a fun craft project couldn't be simpler. Your friends will be astounded at your mad craft skills!
2. Cricut Maker is a handy tool for the sewing enthusiast or sewing newbie. With the rotary blade and the FabricGrip cutting mat, Maker cuts fabric without the need to apply any backing material. I like that I can avoid hand cutting any finicky patterns. I'm still a beginner sewer (and may always be, haha) but the Maker allows me to easily make some very cute sewing projects, like the drawstring bag project in this post.
3. The Maker is more versatile than other cutting machines. The adaptive tool system allows you to easily switch out tools and tips, so you can score, engrave, deboss and, of course, cut, using a wide range of amazing and unexpected materials, including fabric, faux leather, chipboard, aluminum sheets and basswood. The project possibilities are endless!
4. My Cricut Maker is capable of fast and accurate performance. I'm not a very patient person when it comes to getting tasks done. I love that Maker cuts quickly while still following designs accurately, even with trickier materials like thin paper or, on the other end of the thickness spectrum, chipboard. The succulents that I cut out of vinyl to decorate my Maker, for example, have very small details that the machine was able to cut with ease. (You do have to take care not to lose these little details when weeding the vinyl though. I have to call upon my patience sometimes!)
5. Cricut Maker delivers professional quality results. Even if you have no intention of ever selling any of your crafts, it's nice to know that you can produce impressive cards, home decor, jewelry, vinyl and iron-on projects to enjoy in your own home or gift to family and friends. Some of my favourite materials to work with are iron-on and Infusible Ink. Any time you want to produce your own unique t-shirt for you, your children or your baseball team, you can. Check out these cute Tea+Read t-shirts I designed for my book club crew, for example.
And now, on to the drawstring bag project...
And now, on to the drawstring bag project...
Materials needed to make this easy DIY drawstring bag
Cricut Maker
Cricut EasyPress 2 6" x 7"
EasyPress mat
FabricGrip machine mat
StandardGrip machine mat
Washable fabric pen, blue
Weeder
Designer fabric sampler, Blue Carolina
Everyday iron-on material, lilac
Sewing machine
Thread
2 yards ribbon or drawstring
Darning needle
How to make this easy DIY drawstring bag
I based this easy drawstring gift bag on the "Bunny Bag" in Cricut Design Space. Because the project can't be modified, I couldn't delete the iron-on bunny, so I simply went straight to "make it" and ignored the mat with the bunny cuts on it.
Cut the fabric that you're using for the main body of the drawstring bag into two pieces that will each fit individually onto the 12" x 12" FabricGrip mat. I find it easiest to use the rotary cutter and a self-healing mat with ruler for this purpose. You can get the three pieces together in this rotary cutting kit.
I was going to do both sides of the bag in the blue floral fabric but I accidentally cut the small pocket from the floral fabric and didn't have enough fabric left for the back of the bag. No worries, plan B was to keep the floral pocket and attach it to a coordinating fabric for the front of the bag.
Note: If you do plan to use different fabrics for the front and back of the bag, be aware that the front of the bag has one cut at the middle top of the bag and the back of the bag has two cuts at the bottom sides for the ribbon. You'll want the pocket to go on the fabric piece with the cut at the centre top.
Press fabric briefly with the EasyPress 2 to smooth.
Place the first piece of fabric onto the FabricGrip mat, patterned side down so the fabric pen will write on the bottom of the fabric.
Once you proceed to the cut screen, set the material to cotton and insert the fabric pen and the rotary blade into the Maker.
When you have cut the three pieces of fabric, proceed to the iron-on initial.
In Cricut Design Space, choose an initial from the available images. I chose an "L" for my daughter. Size it to fit the pocket fabric. (This L is just over 3.1 inches.) In the pre-cut screen, mirror the image. Choose everyday iron-on as your material when prompted and insert the fine-point blade into the Maker. You'll no longer need the fabric pen.
Place the iron-on liner side down on the StandardGrip cutting mat and proceed to cut. Weed away excess iron-on material, leaving the image on the liner.
Consult Cricut's heat guide for iron-on instructions.
For this project, using EasyPress 2 to apply everyday iron-on onto cotton fabric, the heat guide recommends preheating the fabric for 5 seconds and applying the iron-on material at 315°F for 30 seconds at light pressure. Place the iron-on initial onto the patterned side of the fabric pocket and press. Peel liner off while warm.
Turn the pocket over, fold in the sides (about a cm each side) and press. I found the EasyPress Mini helpful for this part of the project, because the pointed shape and small size is ideal for pressing fabric edges.
With your sewing machine, top-stitch the pocket to the front of the bag, placing it about 2 inches up from the bottom of the bag. Do not sew the top of the pocket closed. Feel free to use a contrasting colour of thread - I used white.
Turn the top part of the front fabric piece down at the draw line and sew across the bottom of the fold to make a casing (in which you will later insert the ribbon). Don't sew the sides of the casing shut. Repeat with the back piece of fabric. (If you're looking carefully at my bag you'll see I did it in the wrong order - I sewed the sides first because I misunderstood the bunny bag instructions. It worked out anyway.)
Place the bag right sides together and sew around the sides and bottom, starting at the casing stitching. (Once again, do not stitch the casing closed.) Turn the bag right side out.
Cut the ribbon or drawstring into two pieces. The instructions suggest half a yard each but I didn't find that was enough so I started out with about a yard per ribbon and trimmed them down after threading them through the bag.
Tie one end of the ribbon to the fabric strip that the Maker cut at the bottom back corner of the bag. Then thread the other end of the ribbon into the casing above using a darning needle, looping it through the back of the casing, around into the opposite (front) side and out through the slit at front centre. Repeat with the other ribbon or drawstring. Knot the ends of the ribbon and trim as desired.
I think it would be fun to make this DIY drawstring bag in a Christmas fabric. When I was a kid my mom made big drawstring bags for my siblings and me. She would use them each Christmas to hold the overflow items from our Christmas stockings. I like a paper gift bag for convenience as much as the next person, but once you have cloth bag whipped together it can be used year after year, making it environmentally friendly and a cute tradition to boot.
Questions for you
Do you have a Cricut cutting machine on your holiday wishlist? Why do you want one? Maybe you already use one? If so, what's your favourite type of crafting project?


I do not consider myself a crafty person. I am not artistic in any sense of the word. I have trouble drawing stick figures, but I think my crafting abilities would soar if I did have a Cricut.
ReplyDeleteI had no idea that Cricut Maker could do all those things.
ReplyDeleteA Cricut machine looks like a rally fun toy! I want one too!!
ReplyDeleteThis drawstring bag looks very cute.
ReplyDeleteThis is so cool and the bad is adorable!
ReplyDeleteNeat trendy project. I like the results-- very popular type of bag too.
ReplyDeleteNice bag!
ReplyDeleteThis is an adorable idea!
ReplyDeletelove that bag
ReplyDeleteThere are so many crafty ideas I have for a cricut.
ReplyDeleteI’m not a very crafty person but I’m thinking about getting a cricut.
ReplyDeleteThat is super cute!!! I'd love to get a Cricut for Christmas!
ReplyDeleteSuch a beautiful bag!
ReplyDeleteThat is so cute and not too difficult to make!
ReplyDeleteWhat a cute bag. I find the Cricut to be so versatile. I'd like to get one one day.
ReplyDeleteI consider myself someones who appreciates others art but the Cricut could open up my creativity I think.
ReplyDeleteCute bag
ReplyDeleteSuper cute! I love how much you can do with the Cricut - the possibilities are endless for new ideas!
ReplyDeleteThat is a really cute bag! I've been wanting to get a Cricut for a while now. I've seen so many fun and creative craft ideas that I would love to try with a Cricut.
ReplyDeleteThat bag is adorable. I don't have a cricut, but I'm wondering if I could do something similar with my silhouette machine.
ReplyDeleteThe cricut maker is on my list of machines I would love. I have another machine, but the cricut does such beautiful things. Love the bag
ReplyDeleteI have always wanted to learn how to sew.
ReplyDeleteCute bag, I wondered what you used a cricut maker for.
ReplyDeleteI love the drawstring bag and love seeing it be made too. Makes me want to try making some too.
ReplyDeleteWhat a wonderful project to work on.
ReplyDeleteThat's a cute bag. My daughter could use something like that for gym clothes.
ReplyDelete